Wednesday, December 24, 2008

Merry Christmas!


Well, as I wait here for Santa to arrive, I thought I should take a few minutes to download those pictures of some of my ornaments I made with the Country Living kit. Almost everything I needed was in the kit! How cool is that, no need to look for glue, glitter, anything. Although, I did add a couple of bobbles from the Pretties Kit to add to the ornaments. Enjoy!
The white frames were stamped with craft Whisper White ink and sprinkled with Dazzling Diamonds. When dry, I sealed it with Modge Podge because I worry about the glitter wearing off over time. I also Modge Podged the paper to protect it.

For the bottom ornaments, I ran the hat pin through the chipboard and ran the beads along the pin. The top of the pin is perfect for attaching an ornament hanger.

A word of warning... its easy to punch chipboard out, but its hard to put it back in place. Make sure it is lined up the same way. They do not have perfect radial symmetry. Also, glue and Modge Podge may coat the sides adding bulk. Be patient and it can be worked back in.

Saturday, December 20, 2008

My Christmas Cards


Although I originally had an elaborate design for my Christmas cards, I decided to keep it simple and cute this year. I was amazed with the cards made by several other crafters using the Top Note die to make the folded cards and had to give it a try. It was so easy, and different. And they stand really well.

I love the Deer Friends hostess set and took advantage of it to make my cards. I couldn't resist coloring the deer's nose red and gave it a touch of crystal effects to help it "glow". And I had to use my new stamp set from the Country Living special to perk up background too.

Thursday, December 18, 2008

Happy Holidays

I have been busy making some holiday projects (in between class and grading papers)
Here are a few of my latest Holiday Projects.

First off, I picked up some new glitter. I usually only play with Dazzling Diamonds, but this time I tried the Fine Cosmo Glitter set. I picked up some glass ornaments, put a couple drops of reinker in. Then, I swirled the ink around to get a fine coat of ink throughout the inside of the ornament. I drained the excess ink out and poured copious amounts of glitter in. I swirled the glitter around to make sure every spot was coated with glitter and shook most of it out. Although I poured nearly the whole container of glitter in, almost all of it came back out. I used rub-ons, like the Old Saint Nick set, to decorate the ornaments.
A couple of tips: Use smaller images, due to the curve of the ornaments. Add the rub-ons in small sections. The white rub-ons show up best. If you make a mistake (and I did) its easy to remove the rub-on and try a new one.

I picked up the Country Living Holiday kit. What a great bargain that is! It had everything I needed. I was thinking about adding glitter to one project and wondered where mine was... no need, it was in the kit!
I made several items. This is the scrapbook page I designed for my Stampin Club. Using the Coluzzle to get the circle, the Designer punch for the tabs, and several circle punches, I came up with the this fun design. I cased a variation of this off of SCS (thanks Doris) because I thought the idea of the ornament design to frame the photos was so creative.

Wednesday, November 26, 2008

Luv

OK, so there were tons of projects that I did and never got around to posting.
Time to make up for that!

First off, here are a couple of things from our last Luv 2 Stamp meeting (I know that was back in September) but here is the swap that I shared. Its all using Riding Hood Red and Confetti White. Very simple Christmas card, but cute.

We also had a 6x6 page swap. Since the Big Shot is the newest toy, we were trying to use it on our pages. It wasn't until I was done that I realized that I used tons of Big Shot materials and not a single stamp set. I love that Big Shot. I also used the new Tango Tangerine. Normally I don't like orange, but I think the Tangerine is starting to work on me.

Also, we made some great projects. This is one of my favorite cards. I love everything about it! The Kiwi ribbon, the Filigree brads, what a great design! I wish I could remember who came up with this fabulous design. I really need to post right away so I don't forget these things.
Kudos to our great Luv 2 Stampers!

Tuesday, November 25, 2008

What a month!! (or two)

OK, my attempt to keep up on the blog fell with my attempt to keep up with life!
The last month and a half were a bit more than I planned. My simple, "oh, its just school, master's class, and normal family" was kicked up a notch with two presentations at different conferences (both on different subjects). I figured I could handle the extra load, but jury duty threw me over the edge.
My master's class is all caught up!
I am almost caught up on grading.
The house is... well... I can see the floor in most rooms again.

And I started working on projects again!

Sunday, September 14, 2008

More Scrapbook pages


OK, while on my working trip to Orlando, I also stopped by Epcot (actually, the conference took us there!)
So, I needed to scrap all those too.

I used post cards I picked up at Epcot and shopped around FOREVER to find paper for each country in Epcot. Took awhile, but my planned worked out ok.


The best part of scrapbooking Epcot, was when my son came to watch and noticed the pictures.

"Mom, where are you in this picture?"

"China"

"China! When did you go to China?"

"Right after I left Japan"

"WHAT! You went to Japan too? When?"

"The same time I went be Italy"

"Italy? Why didn't you take me to all those places!"

He still doesn't quite get it that I was at Epcot.
I guess we'll just need to get a family trip out there.

Sunday, September 7, 2008

Scrapbook pages

Well, it has been busy getting back to school. But I did manage to get some scrapbooking in between teaching, writing lessons, grading papers, and doing my own homework for my masters program.


Being these were Sea World pictures, I thought I would lean towards some aquatic colors.

The new Pacific Point was perfect! And it goes with so many scrapbook papers. I found that it worked great with my official Sea World paper. Plus, its just a great color.

Besides using lots of Pacific Point, I made good use of my dimensional supply. Stampin Dimensionals just make any accept "jump out".

Take a great sticker and stick it on the page and its good. Put it on card stock, cut it out and put a dimensional, its great! It may not be easy to see in the photos, but almost every accent is raised.

And the new ribbons and designer brads! I love them. The Pacific Point grosgrain ribbon is wide and mostly colored. Looks great! And check out the circle designer brads.

If you look close, the background paper that goes so well with the Pacific Point is sometimes the Sea World paper and in some cases is the new Designer Paper. It really all goes so well together!

But, I like to play with lots of colors. I had to bring in some Tempting Turquoise, and its related colors, as well.

A little Tempting Turquoise Designer Paper with some Cool Caribbean and Taken with Teal seemed to bring it all together. I used the new Scallop Punch to make a scalloped border. Although far from perfect, it made a good border. A little brad in the corner just gives a little finishing bling.
Not too bad, if I do say so myself.

Now, I just need to finish sprapbooking the rest of my Orlando trip!

Sunday, August 17, 2008

Decor Elements


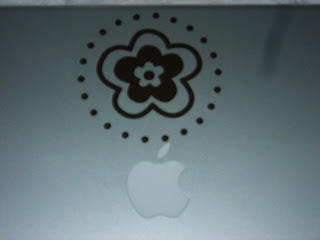
Since I don't have any smooth walls for decor elements, I also tried putting this one on my lap top. Its been on there are hauled around in and out of the bag for a couple of weeks. And its still there. Guess they are pretty durable.

Sunday, July 27, 2008

Decor Elements


The new Decor Elements are really neat. I searched my house for the perfect spot, but there isn't a smooth wall in the entire place. Where to put my DE?
Who says it has to go in the house? Why not the car? I read about other who have used decorative vinyl products on vehicles quite successfully. So I tried putting in on my car windows. How cool is that!

Friday, July 25, 2008

Rub-Ons


Now, I remember trying to use rub-ons for fun as a little kid, but they weren't much fun. I remember stuff sticking to the wrong places and letters getting ripped...
I finally had the courage to try out rub-ons on a transparent plastic bucket I picked up somewhere. Not too bad. It was easy, clean. I guess rub-on technology has come along way!
Now, we'll have to see if I can muster the courage to put them on pictures for scrapbook pages!

Wednesday, July 23, 2008

SU website

OK, I have gone and done it. I have a Stampin' Up Website now! Feel free to check it out and let me know what you think. Its at: http://ksmiley.stampinup.net
Ah, just one more site to play with!

Monday, July 21, 2008

Porcelain Prints Box


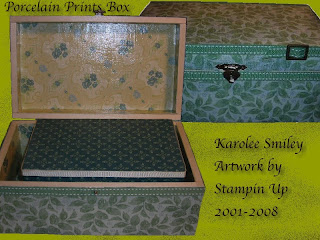
OK, I have been working on this project for too long, but I am finally mostly done. I picked up a set of stacking wooden boxes some time ago. When I first saw the Porcelain Prints, I knew they were perfect for covering the boxes.

I covered the boxes and sealed with Modge Podge. Be careful. My delay was the time to dry, since I put on too much too fast. So, now that they are no longer sticky, I used the double stitch ribbons in Wilid Wasabi and Bayou Blue and Vanilla Grosgrain to highlight.

I love Porcelain Prints. I am sad to see them go. Hopefully, there will be something just as nice in the new catty!

Wednesday, July 16, 2008

Scallop Punch


OK, so some people are wondering about using the new Scallop Punch. This is what I have found that works.


First, notice the scallop markings on each side of the punch. This is the guide you will want to use for punching. The more you punch, the more you want to rely on the punch picture that the plastic edge.

After you punch once, you can see that the silver punch image is visible as you move the paper. You want to place the paper so that none of the silver image is showing.

Once the silver image is hidden, punch and move to the next location. It seems to be easiest to start in the middle and work your way out.


As you punch, the thin strip left along the edge is not stable enough for lining up your punch. That is why it is so important to line up the pictures of the scallops. I do like the look of that strip, so I kept it for my strapbook page.


I can tell... This is going to be one of my new favorites. Now, to try it with the Scallop Stamp set!

New stuff!


I love being a Stampin’ Up demonstrator!
As soon as the Stampin’ Up calendar starts to end, we start to get sneak peaks to the new materials. Even better… we can order some materials early to play with!

I haven’t had a chance to make much, but here is what I did so far.

There are the new In Colors: Baja Breeze, Riding Hood Red, Tangerine Tango, Pink Pirouette, Pacific Point, and Kiwi Kiss.

And of course new Designer Paper. This is using Bella Donna.
I used some Bella Donna paper with Pink Pirouette and Basic Black with the new Scallop Punch (So Cool!!!)

Tuesday, July 15, 2008

Scouting pages


Here are some other scouting pages I have been doing. This one highlights the tag punches. I thought that would offer a fun means for journaling.

The second page uses the old, yet favorite "Scouts at Play" stamp set. The fun thing about stamping is the versatility. You don't always have to just stamp on the background paper. I like cutting and using dimensionals to make the image "pop"

The new Boho look is so fun! Using the western paper and Simply Scrappin Kits captured the western theme for our pack recruitment "Cub Scout Round Up". The thread made a great lasso too!

Scrapbook pages


With one sheet of Cub Scout quotes paper and a couple sheets of Designer Paper, I made this set of pages to showcase my son's graduation to Webelos 2.


Brilliant Blue card stock with Summer Sun and More Mustard mats go well with the colors from the Cub Scout paper.


I used the Designer Paper (Brilliant Blue and So Saffron) to break up the solids and add interest. I also used dimensionals to make the badges "pop".


I also used my Coluzzle and Word Window punch to make this "Arrow of Light". That is my little one's next big goal!

Friday, July 4, 2008

Random Scrappin'


I have been busily scrapbooking: going through and organizing pictures, remembering events to journal, laying it all out and crafting it together. Wow, is very time consuming but rewarding.

I have so many pictures I am scrapping them as I get inspired and will get them organized in albums when I get enough together to see what all I have.

So here is some of my random scrappin'. Here are my pages from Teacher of the Year. The Mellow Moss sets are from the district and the Blush Blossom are from the County. I used one of the old Simply Scrappin' sets: Today and Always. The new pretties kit goes so well with it, especially when I sponged the flowers with Mellow Moss.

I always stock up on Simply Scrappin' kits because you never know when you will want it.